These Tiramisù cream buns are made of a sweet coffee flavoured brioche bun that is topped with a chocolate crumb. The bun is then filled with a vanilla mascarpone cream.

One of my ultimate favourite desserts is the Cream and Jam bun (Bezzun tal-krema). It’s also one of my favourite things to bake. For this reason, I want to start exploring new flavours and ways to enjoy even more this dessert. Thus, the creation of this tiramisù bun! Tiramisù is another dessert which I adore! So this is the best of both worlds for me!
Brioche Buns
For the recipe of these brioche buns I gave a twist to my go-to brioche doughnut, since here, I flavour the dough with some instant coffee powder. The recipe for these brioche buns is quite straightforward, however you need patience in order for the dough to produce enough gluten in it, which will then become a light and fluffy bun. Ideally, the dough is worked in a stand mixer with a dough hook and is left to knead for a while so that this gluten develops. So as to check whether the dough is ready to be let to rest, I recommend to use the windowpane test.
Windowpane Test
To carry out the windowpane test, take a small amount of dough and hold it with both hands (using the thumbs and first two fingers). Gently, spread open your hands so to stretch the dough. Keep stretching gently until the centre part of the dough is translucent. If the dough doesn’t break that means that the gluten has developed and you can prepare your dough for the rising part. However, if the dough breaks easily when you open your fingers, the gluten hasn’t yet fully developed. Therefore, transfer the dough ball back to the main dough and let it knead for more minutes. Try again until the dough passes the windowpane test.

Streusel Chocolate crumb
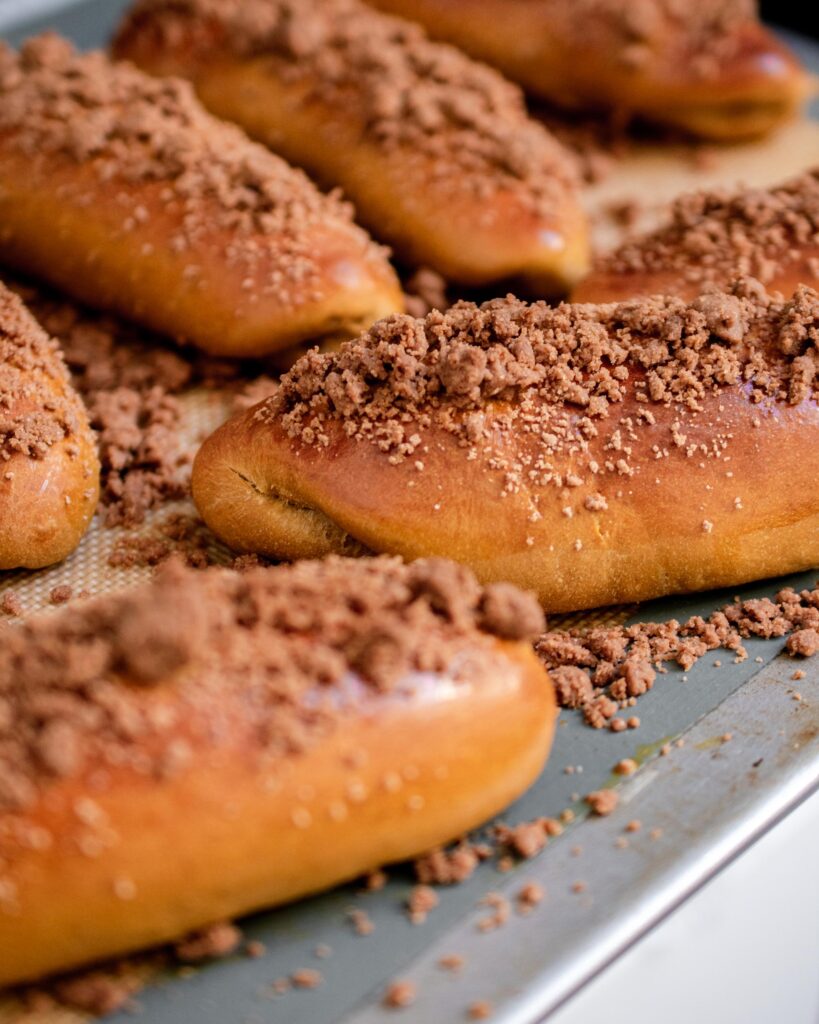
Before baking the buns, I topped them with a streusel chocolate crumb which will give the dessert an extra texture. Trust me, this crumb is a game changer. You can make this streusel crumb with just few ingredients: flour, butter, sugar and cocoa powder. Simply mix together all the ingredients and crumble everything up once everything is all well combined. Once cooked, the crumb will stick to the buns, though some pieces might fall.

Mascarpone cream
For the cream of these tiramisù cream buns, I used a version without eggs, and used heavy cream instead. However, you can also use the classic mascarpone used in the tiramisù with eggs. You can also either opt for one with raw eggs or the one with cooked eggs. Check out my Panettone Tiramisù for the recipe with eggs!

Tip of the day!
Traditionally, vanilla is added to the mascarpone cream! However, after a little mistake from my end when testing this recipe, I have discovered that if you replace the vanilla extract with almond extract, it will taste amazing! The sweet almond taste goes so beautifully well with the coffee and chocolate.

Decorating!
Once filled with cream, you can leave the buns as is, or else add some extra touches. To mine, I have added some shaved dark chocolate, extra bits of chocolate crumbs and lastly, the typical cocoa powder dust!

Tiramisù Cream Buns
Ingredients
Brioche Buns
- 300 g strong bread flour
- 125 ml milk lukewarm
- 30 g castor sugar
- 6 g active dry yeast
- 1 egg
- 30 g butter room temperature cubed
- 1/2 tsp salt
- 5 g instant coffee
- Egg wash – 1 egg whisked with 1 tsp water
Mascarpone cream filling
- 200 ml heavy cream
- 400 g mascarpone cheese
- 60 g icing sugar
- 1/2 tsp vanilla extract
Streusel Chocolate crumb
- 50 g plain flour
- 20 g sugar
- 30 g butter
- 1 tsp cocoa powder
Instructions
Streusel Chocolate crumb
- In a bowl combine together the flour, cocoa powder, butter and sugar. Once combined crumble everything up. Place in the fridge until it’s time to bake the buns.
Brioche buns
- In a mixer bowl activate the yeast by adding the yeast, milk and sugar. Let the mixture foam for about 15 minutes.
- In a separate bowl add together the flour, salt and coffee. Set aside
- Once the yeast is activated add the dry ingredients together with the egg to the mixer bowl. With a hook attachment knead the dough for about 3 minutes, until a soft dough starts to take shape.
- Then gently add the diced butter one piece at a time until all the butter is incorporated. Let the dough knead for about 10 minutes. Make sure it passes the windowpane test*.
- Cover the dough and let it rest for an hour in the warmest place in your kitchen until it doubles in size.
- Line a large baking tray with parchment paper and dust it with flour. Set aside
- Once the dough is doubled in size, transfer it to a well floured surface. Divide the dough into 8 equal parts, form into balls and cover.
- Flatten each dough ball down slightly and roll it into a sausage shape about 10cm long. Repeat until all buns are ready. Place the buns on the prepared tray keeping a good amount of space between each one. Cover and let rise for another 30 minutes.
- Preheat the oven to 180°C or 350°F while the buns are rising.
- Before placing the buns into the oven, brush them with the egg wash and sprinkle each bun with a good amount of steusel crumb.
- Bake in the oven for about 15 minutes, until the bun have a nice golden brown colour.
- Once baked, let them rest for a couple of minutes before filling with the mascarpone cream.
Mascarpone cream filling
- Place the heavy cream, icing sugar and vanilla into a bowl. With an electric whisk or in a stand mixer whip the mixture to stiff peaks. Gently fold in the mascarpone cheese. Transfer to a piping bag with your favourite nozzle and place in the fridge until ready to use.
Assembly
- Cut each cooled bun vertically. Be careful not to cut through the bun. Fill each bun with the mascarpone cream. Dust the buns with cocoa powder and chocolate shavings.
- Serve and enjoy! **
Notes
If you have any questions, feedback or comments on this recipe, please leave a comment below. Please also rate this recipe by double clicking on the stars below. If you did make this recipe, tag @apronandwhisk and hashtag #apronandwhisk, as I’m curious to see what you create!
Don’t forget to subscribe to the mailing list down below so to receive the recipe updates straight to your mailbox!








Leave a Reply