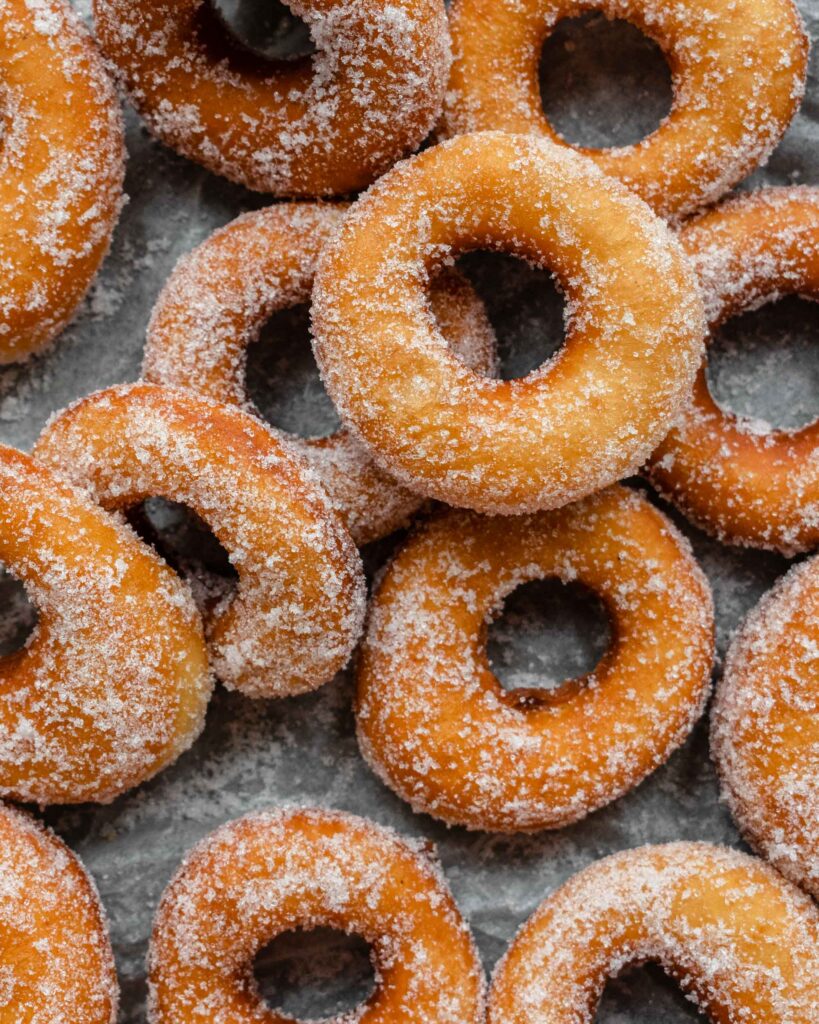
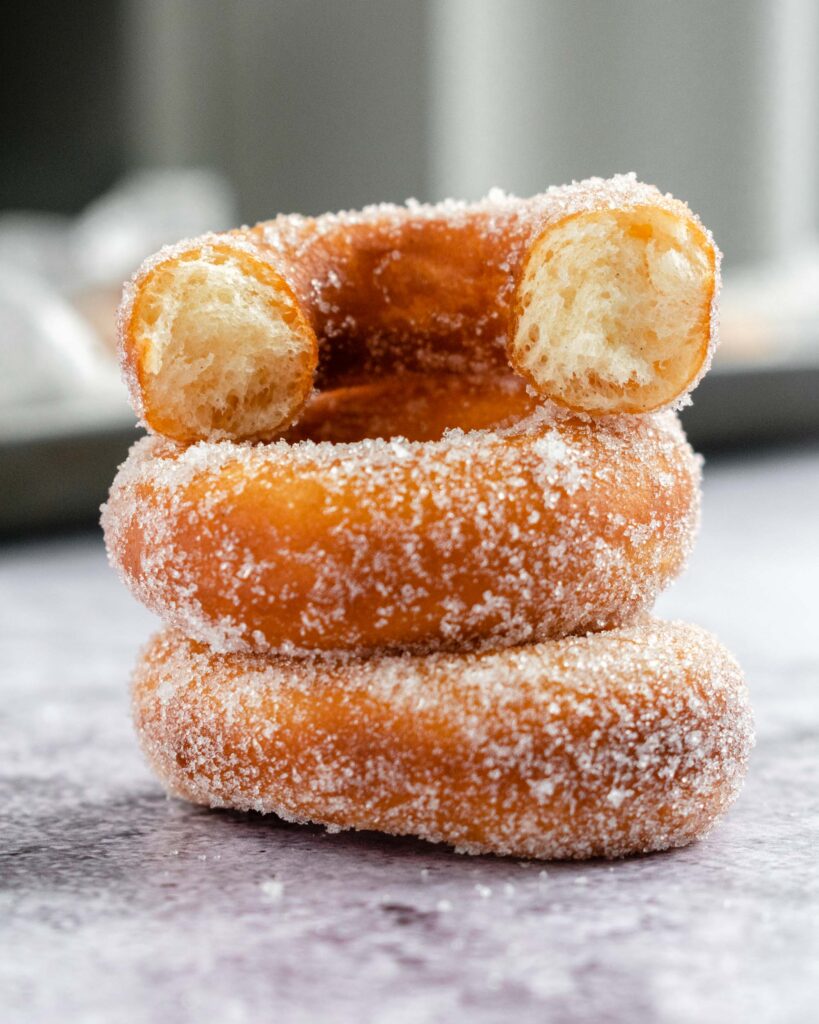
These mini doughnuts tal-festa are a traditional treat found on the Maltese streets in Summer, during the village feasts! They are the perfect mini bite sized fried soft doughnuts covered with sugar. What else do you need?

In Malta, traditionally every Summer you’ll find a feast (festa) in every village dedicated to the patron saint of that particular village. I was born and raised in Ħal Qormi, one of the largest villages on the island. For this reason, each year there are actually two feasts for two different saints! I come from the part of the village which celebrates Saint George during the last weekend of June. The other one is dedicated to Saint Sebastian held during the third week of July.
Feasts consists of a week long religious celebrations in church but also of celebrations around the villages. There are processions with the saint’s statue, fireworks, late night parties and any type of celebration you can imagine. As you might be thinking, a lot of people gather from within the village and even from outside, with some being extremely crowded. Apart from all the celebrations, one of the beauty of feasts is the food!


Festa Foods
Basically, on every main street from which the feast celebrations pass through there will be at least a stall selling some sort of food. You can find the famous trucks selling hot dogs, burgers and other savoury foods. Although for me, my go to is a white paper bag filled with thick cut fries (chips) with plenty of salt and ketchup, which is better known as borża chips tal-festa. Other staples which you can find during the feasts around the islands are stalls selling qubbajt (Maltese nougat), ħelwa tat-tork (Maltese halva) and perlini; the kids favourite candy floss stall which will be rightly placed next to a toy stall; and lastly, stalls selling fried desserts. Because let’s be honest, during a festa, we can forgive ourselves in eating less healthy foods. The latter stalls will be mainly selling imqaret (fried dough filled with dates) and these mini doughnuts tal-festa!


Sugared doughnuts
As I’ve been living abroad for a while now and with Covid cancelling all of the feasts, I’ve been craving some of these treats even more! Especially, these mini sugared doughnuts. The doughnut stalls are basically a machine pumping out dough into hot oil and then transferred to a basin filled with sugar. Then you will get a bag filled with warm and soft doughnuts covered in sugar. I know, they might not be the healthiest but it’s a delicious once in a while treat.


For these doughnuts, I used a classic doughnuts recipe infused with a touch of nutmeg. When making doughnuts one of the most important things is to have patience. Ideally, the dough is worked in a stand mixer with a dough hook and is left to knead for a while so that the gluten develops. To check if the dough is ready to let it rest, I recommend to use the windowpane test.


Windowpane Test
To carry out the windowpane test, take a small amount of dough and hold it with both hands (using the thumbs and first two fingers). Gently, spread open your hands so to stretch the dough. Keep stretching gently until the centre part of the dough is translucent. If the dough doesn’t break that means that the gluten has developed and you can prepare your dough for the rising part. However, if the dough breaks easily when you open your fingers, the gluten hasn’t yet fully developed. Therefore, transfer the dough ball back to the main dough and let it knead for more minutes. Try again until the dough passes the windowpane test.

Serve hot!
A must for these mini doughnuts tal-festa is that they are served warm or on the same day you make them. They are quite delicate so to fully enjoy their deliciousness it’s best to not leave them hanging around. If you have leftovers, I recommend to heat them up slightly so that they gain back some of their moisture. However, I don’t recommend that you leave these doughnuts stored for more than a day as this will alter significantly their taste and texture. Additionally, you can use this doughnut recipe to your liking. You can make them bigger, not sugared but glazed or even leave them plain. They are basically a canvas waiting for you to express your creativity.
Mini Doughnuts tal-Festa
Ingredients
- 300 g strong bread flour
- 125 ml milk lukewarm
- 45 g castor sugar + extra for covering the cooked doughnuts
- 6 g active dry yeast
- 1 egg
- 30 g butter room temperature, cubed
- 1/2 tsp salt
- 1/2 tsp nutmeg
- 1/2 tsp vanilla extract
Instructions
- In a mixer bowl activate the yeast by adding the yeast, milk and sugar. Let the mixture foam for about 15 minutes.
- In a separate bowl add together the flour, salt, nutmeg and vanilla extract. Set aside
- Once the yeast is activated add the dry ingredients together with the egg to the mixer bowl. With a hook attachment knead the dough for about 3 minutes, until a soft dough starts to take shape.
- Then gently add the diced butter one piece at a time until all the butter is incorporated. Let the dough knead for about 10 minutes. Make sure it passes the windowpane test*.
- Cover the dough and let it rest for an hour in the warmest place in your kitchen until it doubles in size.
- Once the dough is doubled in size, transfer it to a well floured surface. Make sure that you flour also your rolling pin and the top of your dough.
- Roll the dough to about 0.5 cm thickness.
- Line a large baking tray with parchment paper and dusted with flour. Set aside
- With either a cookie cutter, a doughnut cutter or a glass cut the doughnut shapes. I used a 6cm glass. For the centre hole you can either use a small cookie cutter or a piping bag nozzle. Place each doughnut on the floured baking tray and leave some space between one another. I recommend to also save the doughnut holes and place them with the doughnuts rather than rolling again.
- It's important that you cut the doughnut shapes as close as possible, this will limit the amount of time the dough is reshaped which isn't ideal.
- If you have a good amount of extra dough repeat this step only once. Once you have all your doughnuts, cut the scrapes of dough into random shapes. These will be ideal to test the oil and as a nibble while you fry your actual doughnuts.
- Once ready cover the baking tray and let them rest for 30 minutes. Prepare a plate with castor sugar. Set aside.
- In the meantime, fill a large pot with vegetable oil. Pour enough oil so that the doughnuts have enough space to cook in. Heat the oil to about 170°C/340°F.
- Gently add the doughnuts to the hot oil and let them cook for about 30 seconds on each side. Transfer the cooked doughnuts to a plate lined with paper towels so that it will dry out any excess oil.
- While still hot transfer the doughnut to the sugar plate and cover the doughnut completely.
- Serve and enjoy! **
Notes
If you have any questions, feedback or comments on this recipe, please leave a comment below. Please also rate this recipe by double clicking on the stars below. If you did make this recipe, tag @apronandwhisk and hashtag #apronandwhisk, as I’m curious to see what you create!
Don’t forget to subscribe to the mailing list down below so to receive the recipe updates straight to your mailbox!


Leave a Reply