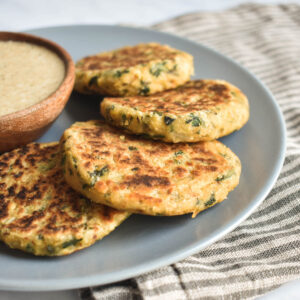
These chickpea and chard fritters are the ideal plant based protein packed lunch. They can be enjoyed on their own with a garlic tahini sauce or made into a hearty meal placed in a burger bun or wrap.

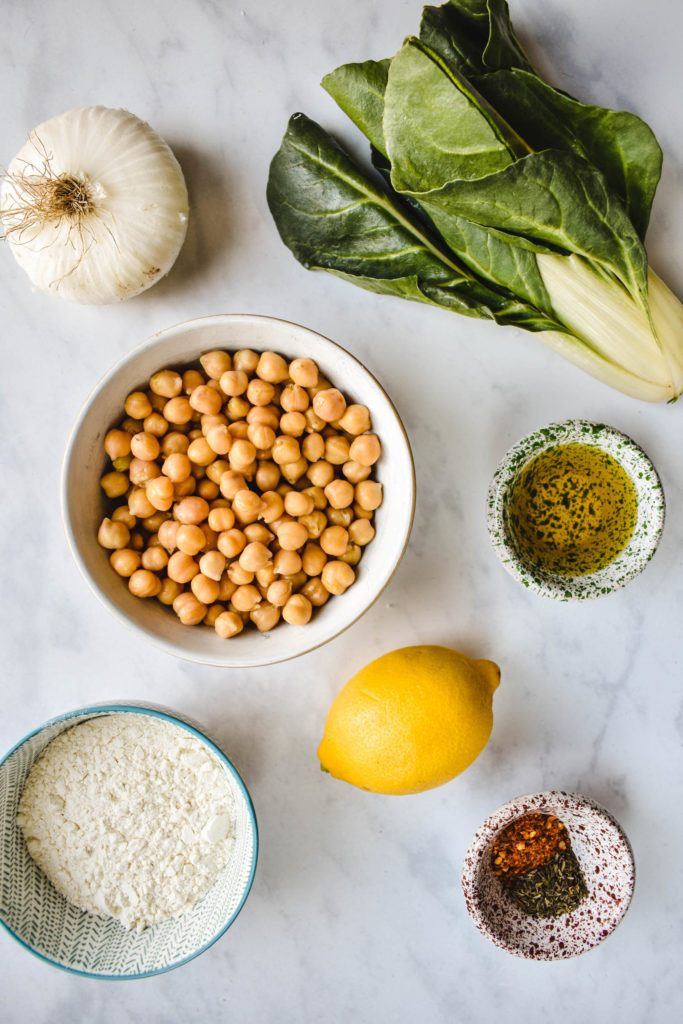
Recently, I’ve been trying to experiment with vegetables that I’ve never cooked with before, and chard is one of them! Chard is one of those leafy green vegetables which I’ve eaten several times that I’ve never got myself to cook. Although things changed recently! When ordering our grocery online, I saw that the Italian grocery store we were ordering from had a good deal on chard, so I said why not!? When the order came, I realised that even though it was a great buy, I got myself more chard than I expected!
Discovering Chard
If you have read the “About me” page, you might now know that my husband is a picky eater. He is especially picky when it comes to vegetables, and as soon as he saw the insanely amount of chard he said; “how are you going to eat all of this?”
I knew I had to get inventive as I didn’t want to throw any of this delicious goodness away. I knew that I could freeze some, but unfortunately in my rental we only have a really small freezer. So, I was on a mission to try and incorporate this vegetable in many dishes: I cooked this chard with some onions as a side or condiment, I added them to a frittata, I also prepared some Sicilian pasta with it – which to be honest turned out better than expected and is now one of my favourite pasta dishes. I was just basically eating chard everyday, for lunch and dinner.
With my last batch, I wanted to create something more plant based so I created these chickpea and chard fritters. When we were still able to go to the office, I loved taking with me vegetable fritters for lunch. They keep nicely in the fridge, are easy to heat up, and are always packed up with delicious nutrients.

Making the fritters
For these fritters, I initially cooked the chard with some onions and then I let it cool down. In a food processor I’ve added the remaining ingredients, as if I was making hummus, yet, the consistency was a bit more thicker and shaggy dough like, basically a sticky mess. Then I just combined the chard with the dough, shaped them in a ball and fried them up in olive oil. And let me tell you, they came out perfectly! I love how the outside came out slightly crispy but the inside was all soft and tender.
As chickpeas go great with tahini, I’ve whipped up a batch of garlic tahini sauce to serve with them. It turned out beyond delicious. It’s the perfect plant-based meal for when you want something filling and protein packed but easy to make!

Substitutions
If you don’t have chard, or you don’t like it, you can easily substitute it with any leafy greens you might have handy such as spinach, collard greens, kale, bok choy, and so on. Don’t forget to eliminate some of the excess water, so to avoid that the fritters end up getting too soggy. If they are soggy they won’t hold. You would need to incorporate more flour to your mixture to help it maintain its patty shape.


Tips how to cook chard
The best way I’ve found to cook chard is to cut the stalks from the leaves, and chop them in tiny pieces. Heat up some olive oil in a pan, cook a white onion for a few minutes. Add the stalks and let cook for about 5 minutes until they’re soft. To the mixture, add the leaves – chopped or left whole, as desired – and let everything cook for a few minutes until the leaves are wilted.
Chickpeas & Chard Fritters
Ingredients
For the chickpea and chard fritters
- 250 gr chickpeas 1 can
- 200 gr chard
- 120 gr plain flour
- 1/2 white onion diced
- juice of one lemon
- 1 tsp oregano
- 1 tsp thyme
- 1/2 tsp chili flakes
- salt & pepper
- 2 tbsp olive oil
For the garlic tahini sauce
- 125 ml tahini
- 2 garlic cloves
- 2 tbsp basil
- 2 tbsp lemon juice
- 2 tbsp olive oil
- 100 ml water
- salt & pepper
Instructions
How to make the chickpea and chard fritter
- In a frying pan, heat up 1 tbsp of olive oil and cook the white onion until soft. Add the chard, season with salt and pepper and cook for about 10 minutes until wilted. Let cool
- In a food processor place all the remaining ingredients, except for the olive oil, and process until you get a smooth mixture.
- Once cooled, add the chard to the chickpea mixture and combine together.
- Heat some of the olive oil in a frying pan on medium heat.
- Wet your hands, as the mixture is sticky, and scoop 1 tablespoon of the mixture at a time. Form into a ball and slightly flatten it before placing it into the frying pan.
- Gently fry them for approximately 3 minutes on each side, until slightly golden.
- Place on a paper towel lined plate, so that they don't get soggy.
How to make the garlic tahini sauce
- Add all the ingredients to a food processor and blitz everything for a few minutes until a smooth sauce is obtained. Add more water if needed.
Notes
- Do not overcrowd the pan, as they will stick together and they won’t cook uniformly.
- They can be stored in the fridge for about 3 days.
If you have any questions, feedback or comments on this recipe, please leave a comment below. Please also rate this recipe by double clicking on the stars below. If you did make this recipe, tag @apronandwhisk and hashtag #apronandwhisk, as I’m curious to see what you create!
Don’t forget to subscribe to the mailing list down below so to received the recipe updates straight to your mailbox!





Leave a Reply