Indulge in this ultimate fall dessert, Pear Chocolate Crisp, made with juicy pears and a rich chocolatey crunchy topping. A perfect decadent dessert for cosy evenings!

Some of the best desserts are those that require minimal effort yet never disappoint. Fruit crisps are a simple rustic dessert that make use of the best ripe seasonal fruits and require only a few pantry staples. While they’re popular in spring and summer, crisps are just as ideal for autumn, when seasonal fruits and comforting flavors take center stage.
For me, autumn is all about apples and pears, enjoyed both fresh and in baking. While I love apple treats, pear and chocolate desserts have my heart! This pear chocolate crisp is as indulgent as it gets, each bite lets the pears and chocolate shine together in perfect harmony. It’s the perfect decadent treat to enjoy on a chilly evening, bringing warmth to you and in your home.

Ingredients for Chocolate Crisp
- Flour – basic plain or even self raising flour work well in this recipe! Alternatively, for a gluten-free pear chocolate crisp, you can use gluten free flour with a 1:1 ratio or else almond flour, although for the latter you will need to increase the amount needed.
- Sugar – I use a combination of white caster sugar and dark brown sugar. However, you can just choose and use one type!
- Oats – this is what differentiates a crisp from a crumble. I use rolled oats for a crispier topping.
- Butter – an essential ingredient to combine everything together! If you want to make this vegan, you can substitute with coconut oil.
- Salt – a little bit in desserts to enhance the flavours!
- Cocoa powder – apart from giving a brown tint to the whole crisp, it will give the crips a light chocolate aroma.
- Chocolate – small chunks of chocolate are folded in the crisp topping for a suprise bomb of melted chocolate in the whole crisp.
- Walnuts – the perfect nut to pair with chocolate! They add a satisfying crunch, making this crisp heartier and cosier.
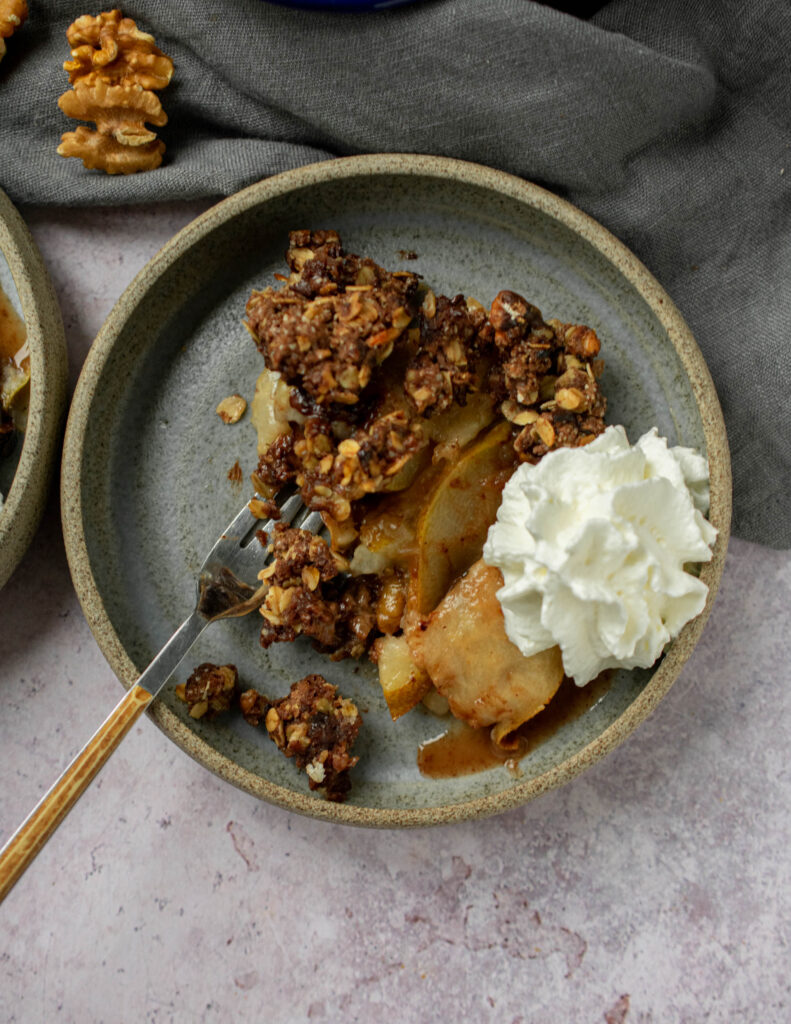
How to make the best Fall Favourite Fruit Crisp
Start by cutting the fruit to your liking! I prefer to cut my pears into thin slices, but chunks work just as good. Toss the fruit in the flour, sugar and lemon zest and juice. Prepare the crisp topping by mixing together the dry ingredients and then gently rub in the butter to form clumps. In a battered dish add the fruit and top with the clumps. Make sure to cover all the top of the dish. If you end up with extra topping – since your dish might be smaller than mine – save the clumps in the fridge (stays good for about 3 days) to make another mini crisp!
What type of dish to use
Any dish can be used to make this easy pear chocolate crisp recipe. I like to use a shallow pie dish, as I find that it gives me the best filling to topping ratio. You can use cake dishes, enamelware, or even a cast iron! My dish was 28cm, however you can just choose any dish you have at home. However, take note that you might need less or more fruit!

FAQs
What type of pears work best for a crisp?
As long as they are not fully ripe and soft, most pears will work in this crisp. When baking, I personally prefer to use these type of pears, such as; Anjou, Bartlett, Bosc, Concorde or Conference.
What other fruit can I use instead of pears?
This recipe can be used as a guide on how to make any fruit chocolate crisp. In my opinion, not all fruits go with chocolate, but here are some fruit options you can do for this crisp. Either banana on its own or mixed with pears or apples; cherries also go so well with chocolate and will make such a delicious crisp! With pears you can also add some raisins, coconut or even raspberries! All the fruits mentioned here pair well with chocolate!
How to serve this delicious crisp?
Let the crisp cool slightly before serving, this will allow the juices to settle and thicken. While still warm, serve the fruit crisp with a scoop of ice cream (my favourite option: vanilla) or a generous dollop of whipped cream as a luscious dessert! You can also serve this with Greek yogurt for a healthier dessert or as sweet breakfast!

Can I prepare this pear chocolate crisp in advance?
It can easily be prepared ahead and then re-heated, if you want, before serving. Store the prepared fruit crisp in the fridge tightly covered. It can last up to 3 days. If you want to serve warm, simply heat the crisp in the oven for about 15 minutes at 170°. Or else, heat individual servings in the microwave. You can also prepare the topping alone in advance; it will keep well in an airtight container for at least 2 days. Simply use it when you want to make the fruit crisp.
What can I use instead of Carob Syrup?
Carob syrup might not be easily accessible everywhere. I opted to use it, as I feel it adds an extra chocolatey touch to the whole crisp dish. However, if you want to substitute it, simply swap the syrup mentioned in the recipe with any of the following substitutes and you will get a similar result: sugar, maple syrup, honey or agave syrup.
Pear Chocolate Crisp
Ingredients
Chocolate Crisp Topping
- 150 g flour
- 100 g oats
- 115 g butter
- 50 g white sugar
- 50 g brown sugar
- ½ tsp salt
- 30 g walnuts chopped
- 2 tbsps cocoa powder
- 60 g chocolate chopped
Fruit Filling
- 5 pears
- 1 tsp vanilla extract
- 1 tsp cinnamon
- 60 ml carob syrup
- 2 tbsp flour or cornstarch
Instructions
- Chop the fruit to your liking and coat with the vanilla extract, carob syrup, cinnamon and flour. Place the fruit in a buttered dish.
- In a bowl mix together all the ingredients except the butter and chocolate. With your hands rub in the butter and form clumps. Fold in the chopped chocolate.
- Spread the clumps all over the fruit, making sure that the fruit is all covered. Bake the fruit crisp at 170°C for about 45 minutes or until all bubbly and golden.
- When ready, let the crisp rest for about 20 minutes so that juices thicken. Whilst still warm serve the fruit crisp in a bowl topped with a generous scoop of ice cream.
Nutrition
If you have any questions, feedback or comments on this recipe, please leave a comment below. Please also rate this recipe by double clicking on the stars below. If you did make this recipe, tag @apronandwhisk and hashtag #apronandwhisk, as I’m curious to see what you create! Don’t forget to subscribe to the mailing list down below so to receive the recipe updates straight to your mailbox!



Leave a Reply