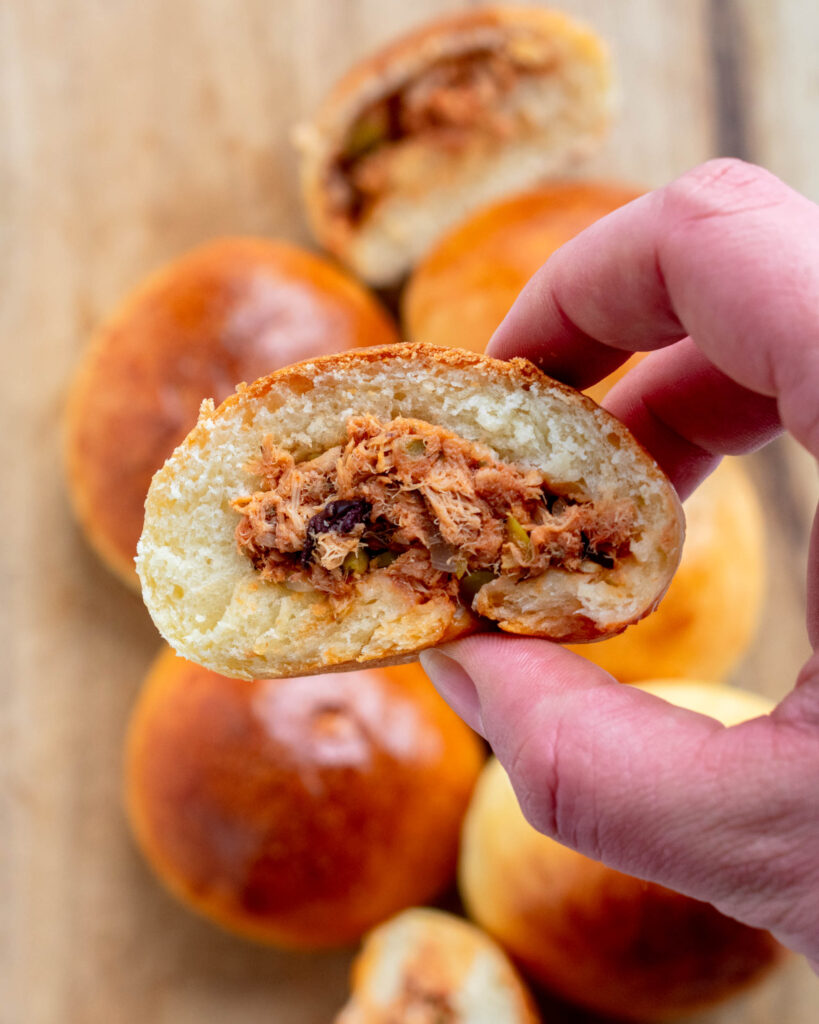
Soft fluffy warm buns filled with a tuna and olive mixture. These stuffed tuna buns are an ideal savoury addition to your appetisers or snacks repertoire.

When I was younger I remember looking forward for special occasions at home as I knew that my mum would serve these buns! Granted, she would buy them ready made and heat them up, but I used to be so looking forward to eat them. There is something so comforting about a warm bun stuffed with such goodness. As I had been missing a lot from home now, I had almost forgotten about these buns. Yet, recently they came back to my memory and I knew I had to make them as soon as possible! I spent a whole Saturday making these buns and it was such a great day. I loved ending the day eating them and knowing that I stacked my freezer for any future craving.


Bun dough
For these stuffed tuna buns, I wanted something light and fluffy but still sturdy enough to hold the filling inside. I went for a similar bun recipe which I have already shared on here, Saint Martin’s sweet bun. However, this time I made a plain bun. This dough is really easy to make. All you need is to start by activating the yeast in the milk and sugar mixture. Mix the flour with butter, to get a crumbly mixture. Afterwards, simply add both mixtures and the remaining ingredients and mix well until you get a super soft dough. Normally, I let my dough mix for about 15 minutes in the mixer. However, if you are going to knead this by hand, it will take you longer: about 30 minutes of kneading. All that’s left is patience and to let the dough rise in a warm place.


What’s in the filling
The filling for these buns is prepared at room temperature and there is no need to cook anything in advance. Simply combine well together the tuna, chopped olives, minced garlic, chopped onion, tomato paste and season everything with dried mint, dried oregano, lemon juice, salt and pepper. You can prepare this filling and place it in the fridge until it’s time to fill the buns.
Freezing the buns
This recipe makes about 16 small buns. If you won’t be eating them immediately, you can freeze the raw stuffed buns in the freezer and then cook them from frozen once ready. However, be aware that this will take longer than the time indicated below. Or else, you can also freeze the buns once they have been baked and then simply thaw and re-heat them when ready to eat.

Stuffed Tuna Buns
Ingredients
Bun Dough
- 400 g strong bread flour
- 75 g butter room temperature
- 30 g castor sugar
- 250 ml milk lukewarm
- 11 g active dry yeast
- 1 tsp salt
- 1 egg for egg wash
Tuna Filling
- 200 g tuna 2 cans
- 1 tbsp tomato paste
- 2 tbsp green & kalamata olives chopped
- 2 garlic cloves minced
- 1 small white onion finely chopped
- 1 tsp dried mint
- 1 tsp dried oregano
- juice of half a lemon
- salt and pepper to taste
Instructions
For the Buns
- In a small bowl mix the lukewarm milk, yeast and sugar. Let the mixture foam for about 15 minutes.
- In the meantime to a mixer with a dough hook, mix the flour and the butter until you get a crumbly texture. Once ready add all the remaining ingredients together and knead the dough for about 15 minutes.
- Cover the dough and let it rest for an hour in the warmest place in your kitchen until it doubles in size.
Tuna filling
- While the dough is rising, prepare your filling.
- Prepare all the ingredients in a bowl and mix well together. Store in the fridge until it's time to fill in the buns.
Assembly
- Preheat the oven to 180°C or 350°F. Line a baking tray with parchment paper. Set aside.
- Once the dough is ready, punch it down and knead for a couple of minutes. Divide the dough into 16 equal parts and form into balls.
- Flatten each dough ball down and place the filling in the middle. Close the edges and roll into a bun. Making sure that none of the filling is oozing out.
- Place the buns on the tray keeping a good amount of space between each one. Cover and let rise for another 20 minutes.
- Before placing the buns into the oven, brush them with the egg wash.
- Bake in the oven for about 20 minutes, until the bun have a nice golden brown colour.
- Once baked, let them rest for a couple of minutes before serving as the filling might be too warm. Enjoy!
Notes
- You can also cook them in an air fryer: 170°C or 340°F for about 8/10 minutes.
If you have any questions, feedback or comments on this recipe, please leave a comment below. Please also rate this recipe by double clicking on the stars below. If you did make this recipe, tag @apronandwhisk and hashtag #apronandwhisk, as I’m curious to see what you create!
Don’t forget to subscribe to the mailing list down below so to receive the recipe updates straight to your mailbox!




Leave a Reply